

You’ve noticed some minor scratches on your car’s paint job, and now you’re wondering how to tackle them efficiently. While there are DIY solutions available, it’s crucial to understand the depth and severity of the scratches before diving in. Some scratches may be easily remedied with simple techniques, but others might require more specialized attention. By following a systematic approach and utilizing the right tools, you can restore your car’s paint and bring back its original shine. So, how can you effectively address those pesky scratches and make your car look flawless once again?
Assessing the Scratch Severity
To determine the severity of a scratch on your car’s paint, start by carefully examining the depth and length of the mark. Run your finger gently over the scratch. If your nail catches on it, the scratch may be deeper and more challenging to repair. Next, assess the length of the scratch. A longer scratch may require more extensive treatment compared to a shorter one. Look at the edges of the scratch; if they’re rough and jagged, it might indicate a deeper cut into the paint.
Inspect the surrounding area for any signs of paint transfer. If you notice color from another object on your car, it’s likely that the scratch is superficial and can be easily fixed. Additionally, check for any signs of rust or corrosion around the scratch. Rust indicates that the scratch has penetrated through the paint and primer, reaching the metal underneath. Understanding the severity of the scratch will help you determine the appropriate method for repairing it.
Gathering Necessary Supplies
You’ll need specific supplies to effectively remove scratches from your car’s paint. The first item you should have on hand is a car scratch removal product, which can be found at most auto parts stores or online. These products typically come in the form of a rubbing compound or a scratch repair kit. Additionally, you’ll need a clean microfiber cloth to apply the scratch removal product and buff the affected area.
To ensure a smooth application process, it’s recommended to have some water and mild soap to clean the scratched area before starting the repair. This will remove any dirt or debris that could interfere with the scratch removal process. Another essential supply is a wax or sealant to protect the newly repaired area and restore the shine to your car’s paint.
Lastly, having a pair of gloves to protect your hands during the process is advisable. Gathering these supplies beforehand will make the scratch removal process more efficient and help you achieve better results.
Applying DIY Scratch Removal Methods
Consider using a high-quality car scratch removal product for optimal results when applying DIY scratch removal methods. Start by thoroughly cleaning the scratched area with a mild soap and water, ensuring there’s no dirt or debris that could worsen the scratch.
Follow the instructions on the scratch removal product, applying it gently in a circular motion over the scratch. Use a microfiber cloth to buff the product into the scratch, working it in until the scratch starts to fade. It may take several applications to completely remove the scratch, so be patient and continue the process until you’re satisfied with the results.
If the scratch is deeper, you may need to use a touch-up paint that matches your car’s color. Apply the touch-up paint carefully to fill in the scratch, following up with a clear coat to protect the area. Remember to let the paint dry completely before buffing and polishing the area to blend it in with the rest of the paint.
Finishing Touches and Maintenance
For a professional-looking finish, ensure you carefully polish the treated area after removing the scratch. Use a clean microfiber cloth and a quality car polish to buff the area in a circular motion. This step helps blend the treated spot with the surrounding paint, giving it a seamless appearance.
After polishing, apply a coat of wax to protect the newly treated area and enhance the overall shine of your car’s paint. Choose a high-quality carnauba wax or synthetic sealant for long-lasting protection against environmental elements.
To maintain the polished and waxed finish, wash your car regularly with a pH-balanced car wash soap and avoid using harsh chemicals or abrasive materials that can damage the paint. Additionally, consider applying a fresh coat of wax every few months to keep your car looking its best.
Trending Products



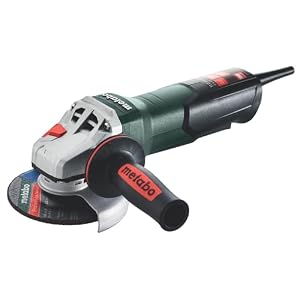
Metabo 4-1/2-5-Inch Angle Grinder, 11 Amp, 11,000 RPM, Non-Locking Paddle Switch, Made in Germany, WP 11-125 Quick, 603624420, Green


